Flame On!

Well here's the surprise of the month.
I'm now gonna disclose what I've been planning since the start of vacation. It's a new blog! And it's called et on Fire.


One fine day I got this feeling that I should start a blog to showcase et cartoons and other artworks, apart from personal blogging. In a brief sentence, this new blog is the result of that thought put into action. And that explains it! Okey, there's something more.. I plan to make some goodies like various graphics and e cards that you can use in your sites! Now that'll be more cool :) .

Don't ever think that I've been working weeks over the new blog. I did it in somewhat 3 days. 
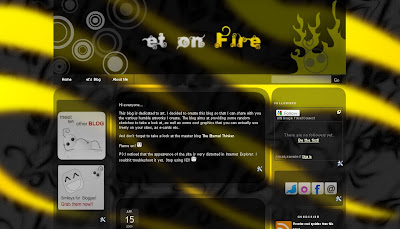
The actual plan was to make some slight alterations to the Eternal Thoughtstemplate(currently used in blog). Even then I put the work aside and stayed idle. And then the day came, and the thought sparked in my head, and I made the Flaming thoughts template, now used by the new blog. I need all your feedback about the design! There's lot of experiment out there!

Why you should never use Internet Explorer??
It's because et on Fire blog looks like crap inside IE. When I tried it with all other browsers it looked just fine. And then in IE7, even the header wasn't displayed at all. I tried many tweaks over it. Then i dropped IE, at last. No matter how popular IE is, I can't delay the release of this blog. So stop using IE. And why should you use IE when you have cool browsers all around and the masterpiece browser Mozilla Firefox?? Go here and get inspired with Mozilla!

Again get inspired with et on Fire! :P

Teh surprise element..
Personal notes
The new blog was in the concept, soon it was put into process. All these times the hardest thing was to keep the surprise for now. There were many times when I was about to spill the secret like when choco started her new blog, during the twitter fight with kaddu and choco, or when I'm simply tweeting etc etc. Not to mention that I survived all these scenarios :) ! Piece of cake :e

Start afresh!

It's that special time of the year again. It's Vishu, the festival of lights and glory. The Kani-konna flowers has blossomed everywhere, and this time the small Konna tree in my house yard has also blossomed! :)

Crackers are making noise in the whole of the place. People will be having their Kani the coming midnight - a wonderful sight which symbolizes glory.. with all fruits, vegetables, cereals and the idol of lord krishna in the golden bowl.. and a reflection of the self in the small mirror, showing us the potential in ourselves, the power within us to change our fate.

This is time to kick start another fresh round, with all good deeds, promises, and a clean heart.
Let there be flowers!! :D


Konna flowers.. and et :)

So go ahead.. talk nice to everyone, hear some refreshing music, do something meaningful and good. And yeah.. watch some good movies; they can work wonders on your day :) . Speaking of which, I watched the movie Bridge to Terabithia. It is beautiful.. and it shows us there is no limit for our imagination. A must watch. Think beyond imagination!!

Have a prosperous time till the next Vishu.
Wish you all a Happy Vishu!! :)

Earth and Sun

Aww.. yesterday I got this mail from my little cousin Paurnami, who is about 10 years now. And I saw that she has made a picture so that I can make it my wallpaper. Well after seeing the image, I was really surprised to see her skill so that I couldn't help posting it here.. and making it my wallpaper :) ! Her impression of the universe, the space and perspective is amazing.

See the little art..


Earth and Sun by Paurnami

(You see some snow on the Earth? Is that Antarctica?)

And the little artist here..


Paurnami(Snap by me!)

I didn't mean to insist you upon using this as your wallpaper! But it's so beautiful to have an original wallpaper from a 10 year old :L . The image is probably made in MS paint and actually is a little smaller to be a wallpaper. Anyhow it looks perfect at my desktop :h !

Lets hope that she'll become a good artist and make more beautiful wallpapers for me ^_^ . And I also noticed that the smaller versions of this pic looks cool. See some of them..


width:200


width:120

You can use them for links in sidebars ,as other graphics, or simply showcase the picture. Feel free :O .

Downloads down here..
The original pic
The 200 width version(smaller one)
The 120 width version(smallest of em all)

Every child born into the world is a new thought of God, an ever fresh and radiant possibility

How to add a unique set of Smileys/Emoticons in your Blogger blog

The ET smileys project kicked off when the Eternal Thinker blog wanted a custom set of emoticons in the blog posts.
After several requests from readers, I am sharing the free custom made smileys for Blogger with all of you! (These emoticons can also be used in Wordpress, Tumblr, or any other blog and website)

Now let your articles communicate more with these original cute smileys. The smiley set contains all the basic smileys plus a collection of interesting icons. You just need to type in the smiley symbol while writing the article, and they'll be converted to smiley images when it is published. Smileys will also display in the threaded comments in Blogger. ^_^ 


Main post content has been moved here

Note [28th May 2015]:
People who's been using et Smiley set already in their blog/website need to move to the newly hosted JavaScript files (check link above). As the earlier version is hosted in Google Code (which is scheduled to be shutdown soon), the smileys will stop working soon.

Smiley update!

It's time for all those little blog updates!

Here comes yet another cool update after the header update - the smiley update. It's nothing but a bunch of smileys to the et's blog :) You see that..? Now the blog posts will be spiced up with all these little smilies rather than the usual emoticons :D

Uff.. that wasn't an easy work :f ! Anyways the smileys comes in most of the usual flavours.. from the shy ones :$ to the devilish ones :v !! Moreover, they appears in comments as well! Enjoy the update :O

Unlike the header update the smiley update is more flexible. I'll be adding more smileys and the best thing is that.. I'll be sharing a bunch of smileys with you people. Just wait for another post on this, when I'll make some more smilies and tell you all how to make them appear in your posts. Also suggest me ideas on any cool smiley that comes in your mind, or those you would love to add in your posts :L . I'll try to include them to the group! :d

Thoughts On Template #2

Previously on TOT: Knowing your Blog Plan

Playing with the <div>

Last time in TOT we saw the basic structure of the Blogger blog. We discussed how the CSS and HTML parts work in union to build up the various blocks in the web page. This time we'll see how to create some cool effects by ourselves. These can be used to make your posts more readable and interesting!

So, the <div> tag is used to PLACE any predefined CSS class in the web page. But we really don't have to define the CSS class every time. We may utilize inline CSS(ie, CSS properties specified within the div tags) then. We will go through some examples which will give you some idea on how to work this out.

At times, we use statements in our posts which may fall under a certain category. Making it more clear.. our posts may contain quotes, certain codes, or we would just like to highlight some part of the post in a special manner. Instead of leaving them in the normal style or doing some simple formatting, we can use a CSS class which defines all formatting properties we need. This can include borders, background colours, and even background images.
See the following example:

Suppose I am including the following quote in my post:
"Think beyond imagination!"

Using CSS, I can make every quote appear like this:
Think beyond imagination
For doing this, first we have to define a CSS class with the required properties. The above example uses the following CSS code:

#quote
{
border:1px solid #D8D8D8;
margin:20px 20px 20px 20px;
padding:10px 10px 10px 40px;
background:#D0A9F5 url("link to image") left top no-repeat;
font-style:italic;
color:#FFFFFF;
}


Use Layout-->Edit HTML from the Blogger dashboard. To make sure you place the above CSS code in the CSS section itself, make it a habit to place them in a common position. You can paste it before the part which says #header-wrapper, or in between any two CSS blocks in the template code.


You can read in detail about the various CSS properties by Googling. It's not necessary that you know everything. You just have to refer whenever you need to know more about using any property.

Anyways some explanations are given below:

The colours:
Colours are specified as their hexadecimal values. #000000 means black and #FFFFFF means white. Everything else comes between these two extremes. You can get an online reference of HTML colour codes here.

Margin and padding:
Both of these sounds somewhat similar, but they are different, anyhow!. When CSS defines a block, margin specifies the distance between the block and it's neibouring ones. Padding specifies the distance from the border of the block and the contents of the block. See the following picture:


Background:
In the above CSS code, you'll see that a background colour and a url of the background image is specified. When no-repeat is not specified, the image repeats itself over the whole block. Somewhat like this:
Think beyond imagination
That's quite a mess. But it looks perfect when you choose the right image!
You can use repeat-x or repeat-y instead of no-repeat(without the left top specification) for repeating the image only horizontally or only vertically:

repeat-x
Think beyond imagination

repeat-y
Think beyond imagination
Hmm.. you can use these in a more creative way as the need comes!

Now, things aren't done yet! We need to apply the CSS properties we defined to the required text, don't we?
First type in whatever you need as usual.
Think Beyond Imagination

Then, switch to the Edit HTML mode in the post creator page:


Here, just add the div tags around the text.

<div id="quote">Think Beyond Imagination</div>

Publish the post, and we're done!!

We can go on define simialr CSS definitions for codes and other highlights. As you can see the code parts above are inside special yellowish boxes. That's nothing but the very same method :).

In case of minor or temporary highlights, you don't have to go for defining a whole CSS code. Here we use inline CSS. See how I used inline css below:

<div style="border:1px dotted black; background:#F2F5A9; padding:20px;">The Eternal Thinker</div>


The result is as follows:
The Eternal Thinker

Further research...
So now you can understand the CSS classes and the way the div tags are used. In addition to making your own code, you can also edit the existing code segments by changing the various CSS properties. Take your time and understand the code, and then start editing! But be cautious.. be on the safe side as mentioned in TOT#1.

So that's all clear I guess!
Enough for now? Yeah.. more than enough :D

Bye for now, stay tuned with TOT!